Here we are, into November. Hard to believe!
This year has completely flown for me. Both my kids play multiple sports (sometimes 2 during the same season) and I have felt like an abused taxi cab driver for the last 10 months! Oye!
November is our one month that is a little on the quiet side…sports take a little break so it’s VERY nice not to be making multiple trips to and from events every evening.
I’ve been able to catch up on some crochet, which I’ve enjoyed immensely! This is my favorite time of year to crochet…the weather is turning cooler here in Michigan, the days are shorter and it gets darker earlier. It’s so nice to curl up in the recliner and work on something new while listening to a good movie!
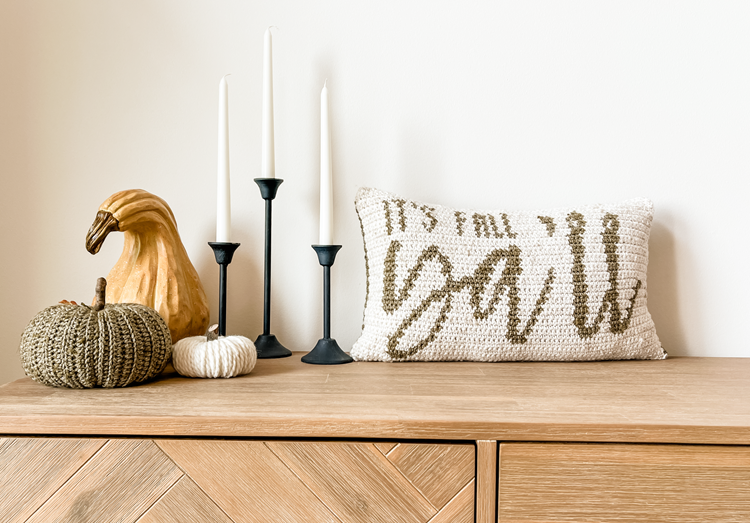
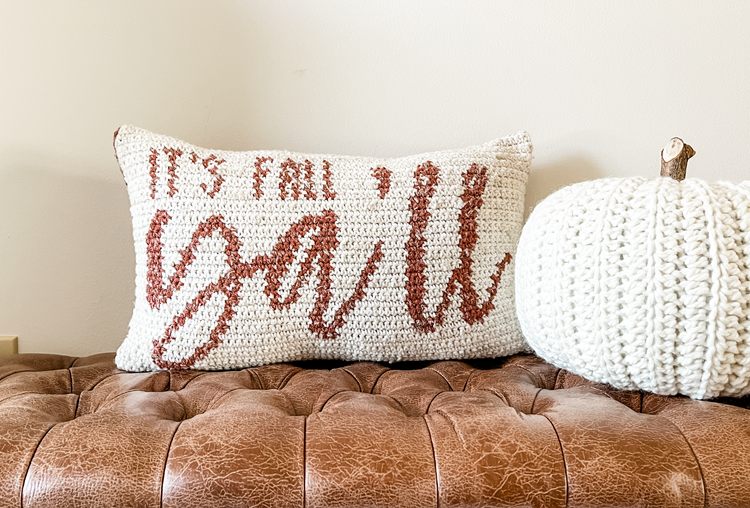
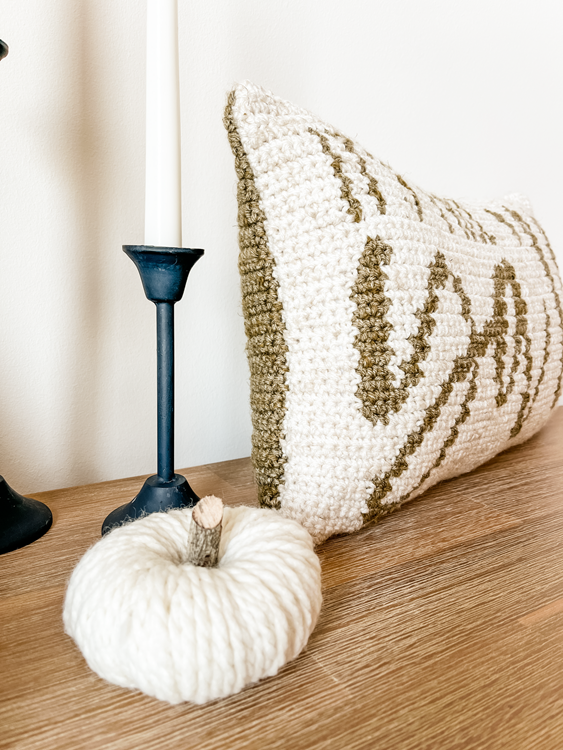
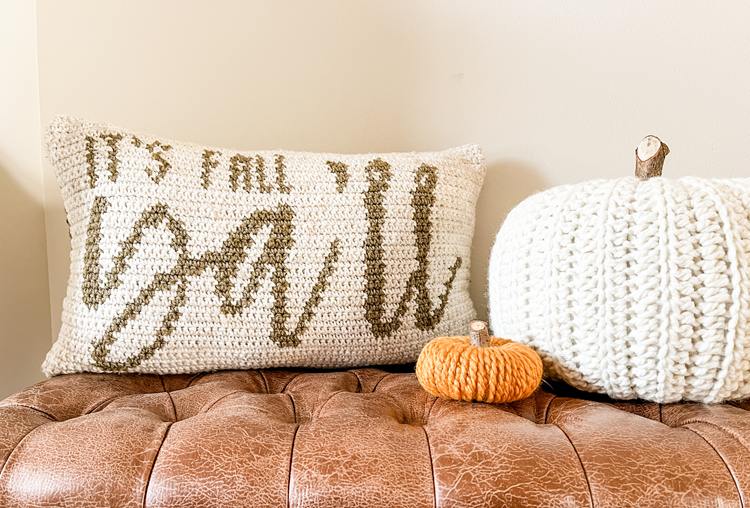
I made the It’s Fall Ya’ll Pillow for the first time back in August. I had planned on releasing it much sooner than now (like, the middle of September…ooof!) but life happens and time was in short supply. We still have over 6 weeks left until the official first day of winter, so better late than never I guess!
I selected a yarn for this project that has a nice “rustic” feel and look to it. I think it really lends itself well to the season, and comes in some stunning autumn colors too!
The It’s Fall Ya’ll Pillow is made by crocheting two panels separately and sewing them together using a running stich for the sides and a whipstitch for the top and bottom. I like using the running stitch for the sides because they have a more “unfinished” look to the edge…the running stitch cleans that up once it’s turned right side out.
The front panel is made by following a chart worked tapestry style (hiding one yarn inside the other by stitching over it)…much easier than it sounds!
There is a video tutorial that really helps with color changes and carrying yarn tapestry style.
It can be found here.
Level:
-Easy
Terms:
-American Standard
Gauge:
-In sc with 4.5mm hook, 14.5 sc = 4”
Finished Size:
-approx 12” X 20” rectangle
Hook Size:
-7/4.5mm
Yarn:
Yarn Bee “Nature’s Nook” in Natural (Color A) and Autumn Singe -or- Moss (Color B)
3.5oz/180 yards/165 meters per skein
Medium Weight 4
You will need:
-Color A: 1 ball
-Color B: 2 balls
Other Materials You’ll Need:
-12”x20” pillow form
-Yarn needle
-Scissors
-Measuring tape
Abbreviations:
ch – chain
sc – single crochet
st(s) – stitch(es)
Special Notes:
For color changes, you want to complete the final yarn over of the previous stitch with the new color for the next stitch. For example, when you are starting your chart for the front panel, row 5 column 60 is your first different colored stitch. As you are completing the sc in row 5, column 59 your final yarn over will be the new color.
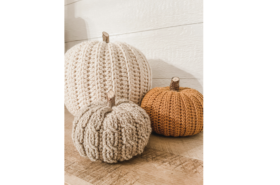
The PDF pattern for the Autumn Pumpkin Duo can be purchased on Etsy here or Ravelry here.
Also, make sure to join our Brooklyn Hookers Crochet Group on Facebook. There’s always a code in that group when I release a new pattern…a free download of the PDF pattern through Ravelry. It’s only good for a limited time so make sure to join the group and not miss out on that. You can find the group page here.
The Pattern:
Front panel:
Begin by chaining 72 with Color A and a 4.5mm hook. Your chart is attached at the end of the pattern.
- (this is row 1 on your chart and it is read right to left, column 1-72) sc in 2nd ch from hook, sc in each st across to end (it is sometimes helpful to mark the last stitch of the row so you know what your starting stitch is once you turn your work), ch 1, turn – 72 sts here and throughout
We are now working backwards 72 to 1….every odd numbered row will be worked right to left on the chart and every even numbered row will be worked left to right on the chart because you are turning your work at the end of every row. Also, every white box will be Color A and every charcoal box will be Color B.
- (this is row 2 on your chart, so we are now working the other direction, left to right, 72 to 1) sc in each st across to end, ch 1, turn
From here on out you will follow the chart. Every square on the chart is a single crochet. You will make the appropriate color changes as you come to those squares. I will continue typing out the first 10 rows so you get an idea on how to read them once the color changes are introduced.
- (working right to left) sc in each st across to end, ch 1, turn
- (working left to right) sc in each st across to end, ch 1, turn
- (working right to left – this is our first row with color changes) sc in the next 59 sts remembering to make the final yarn over to complete st 59 by joining Color B, sc in next 4 sts remembering to make the final yarn over to complete st 63 with Color A, sc in final 9 sts to the end of the row, ch 1, turn
A Tip: the video tutorial I made for this pattern shows the easiest way I have found to do tapestry crochet. After I am finished using Color B in row 5 (st 63) I will make 1 sc in st 64 with Color A while carrying Color B, then I will drop Color B and leave it there. I will pick it back up when I need it there in row 6. This isn’t the easiest to explain in words, so if you haven’t worked tapestry before I strongly suggest you visit the video tutorial and watch what I mean.
- (working left to right) sc in the next 57 sts, change to Color B and sc in the next 6 sts, change to Color A and sc in every st across to the end, ch 1, turn
- (working right to left) sc in the next 8 sts, change to Color B and sc in the next 2 sts, change to Color A and sc in the next 3 sts, change to Color B and sc in the next 2 sts, change to Color A and sc in every st across to the end, ch 1, turn
- (working left to right) sc in the next 8 sts, change to Color B and sc in the next 2 sts, change to Color A and sc in the next 4 sts, change to Color B and sc in the next 2 sts, change to Color A and sc in every st across to the end, ch 1, turn
- (working right to left) sc in the next 55 sts, change to Color B and sc in the next 2 sts, change to Color A and sc in the next 5 sts, change to Color B and sc in the next 2 sts, change to Color A and sc in every st across to the end, ch 1, turn
- (working left to right) sc in the next 9 sts, change to Color B and sc in the next 2 sts, change to Color A and sc in the next 5 sts, change to Color B and sc in the next 2 sts, change to Color A and sc in the next 16 sts, change to Color B and sc in the next 3 sts, change to Color A and sc in every st across to the end, ch 1, turn
You will carry on with the chart just like this. As your finishing the use of Color B in a row, take care to notice where you will first need it in the next row. You will want to carry it tapestry style to the point where you will next pick it up. For example, you will be done with it in row 10 at column 36, but you will need it at column 13 in row 11 so you want to carry it closer to the end of your row 10 instead of dropping it right away. I hope this isn’t too confusing…again, the video is a much better aid for this!
Once you have come to the end of the last row of the chart, fasten off and weave in tails.
Back panel:
Begin by chaining 72 with Color B
- sc in 2nd ch from hook, sc in each st across to end, ch 1, turn – 72 sts here and throughout
- sc in each st across to the end, ch 1, turn
- repeat row 2 for a total of 44 rows
Fasten off and weave in ends.
Assembly:
Place the two panels with the right side facing each other so when the edges are sewn together they will be inside out.
Cut a 3 yard piece of your Color A yarn.
Using a yarn needle, begin at the lower right hand corner. Leaving a 1 yard tail, slip st into both panels to secure the yarn to your work. Working a ¼” from the edge of the two panels, use the running stitch to sew between each row and connect the two side edges together.
Once you have the right side done, use a whipstitch to sew the two panels together at the top (I like to work through front and back loops of both sets of stitches on a pillow to make sure it’s secure).
Once the top is done, working a ¼” from the left edge use the running stitch to sew the other side edges together. Don’t weave your end in yet.
Now it’s time to turn your pillow right side out.
Place your pillow form inside your pillow case.
Using the 1 yard tail you left when you started sewing side one together, whipstitch the bottom two edges together to seal up the pillow. Your two tails should now be at the same corner.
I’m not normally a fan of knots in my crochet work. Having said that, I did tie a sturdy knot to secure the two tails once I finished sewing my pillow up. I wanted to ensure it would not come apart. Also, I figured it would show me right where to cut the yarn in the event I needed to take it apart so I could wash it.
You can now weave in the ends and enjoy your beautiful It’s Fall Ya’ll Pillow!
Thank you SO MUCH for supporting a very small business and designer. I appreciate each and every one of you more than you know!
I love feedback, positive or negative, and I certainly don’t get it right every time. If you have suggestions, criticism, or find anything that needs to be addressed in the pattern, PLEASE feel free to reach out via the Facebook Group below or email: jamie@brooklynhandcrafted.com
Happy Hooking!!
Facebook: https://www.facebook.com/groups/BrooklynHookersCrochetClub
Instagram: https://www.instagram.com/brooklynhandcrafted/ and don’t forget to tag me in your project pictures! @brooklynhandcrafted