You might say there’s a theme going between last week and this week. Because, again, we have a pattern designed around a bottle. Yes, I must admit the original idea was a wine bottle holder, but I promise it holds plenty of other items too! Like, for instance, pretty much any spirit approximately the same size. We can also look to things other than alcohol…think marinades, sauces, or perhaps a skein of yarn and some hooks for a new crocheter! Or bath bombs! It’s a nice, versatile gift bag that can be used for not only Christmas, but any occasion.
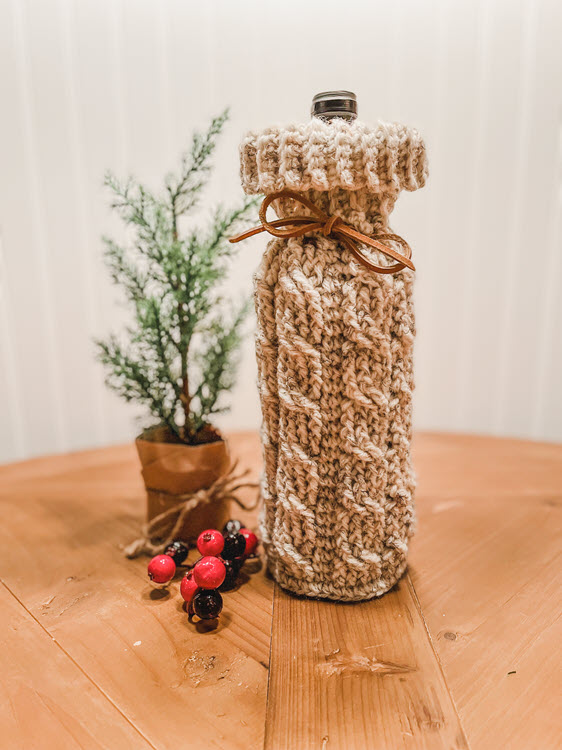
For week 6 we have the Cabled Bottle Cozy.
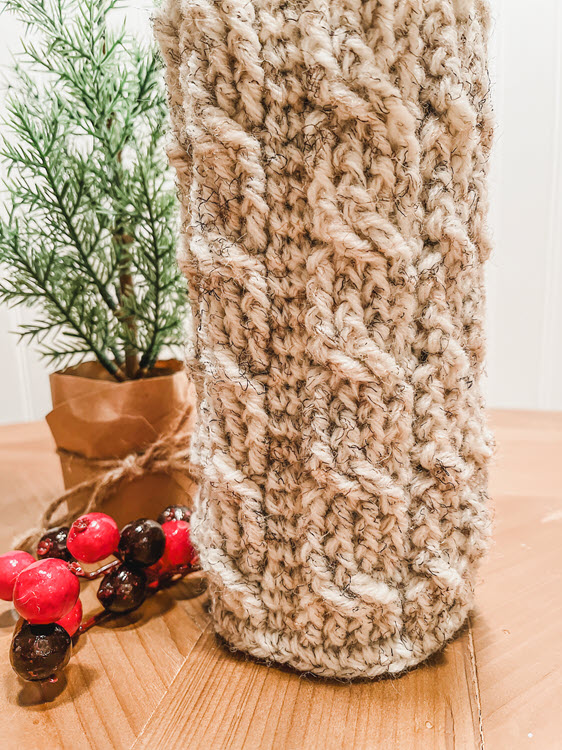
The Cabled Bottle Cozy is a nice introduction to cable work if you’ve never done it. While it looks difficult, once you understand the stitch placement it’s a piece of cake! These work up relatively quick with just one ball of yarn. The pattern calls for Lion Brand Wool Ease. I like Wool Ease because of the bounciness…it’s springy and holds it shape really well. If you don’t have access to Wool Ease or cannot work with wool, no worries! There are lots of other options, any worsted weight yarn will work just fine.
The pattern starts with a magic circle and works in the round, increasing for the first 6 rounds to make the base. Then you will begin working your cabled pattern up to form the cylinder. Finally, you’ll discontinue working in the round for the cuff section. Here you’ll make a chain and then work back and forth from the edge of the cylinder to create a ribbed cuff. We finish it off with leather lacing woven in and out of the stitches around the base of the cuff. If you don’t have leather lacing you can always use yarn…and maybe put little tassels on the end!
Gauge:
4” = 1 repeat of the pattern (there are 3 repeats per row of the body). So every 14 sts done in a row should measure 4”.
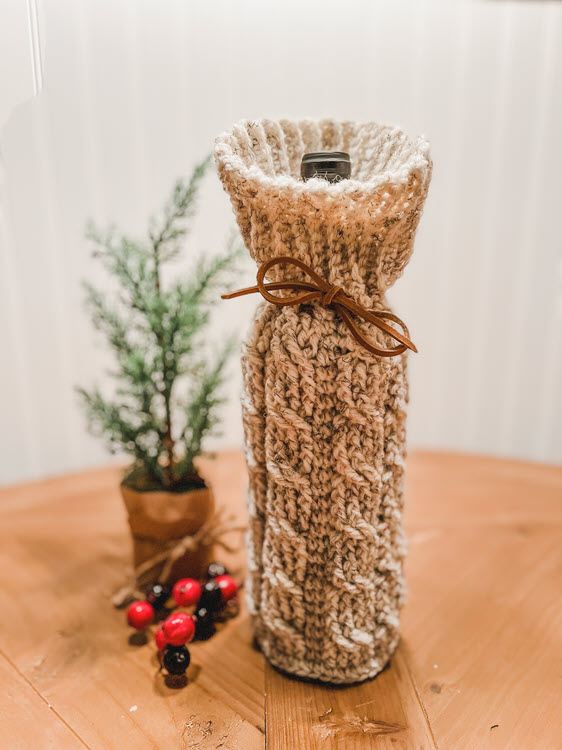
The finished size of the cozy is approximately 13” tall and 3.75” in diameter.
Hook Size:
-5.5mm (I) hook
Yarn:
-Lion Brand Wool Ease, 3oz = 197 yards/180 meters…1 ball in Wheat colorway
Other Materials You’ll Need:
-Scissors
-Yarn Needle
-Stitch Marker (optional, for the beginning of each row)
-Leather Lacing
Abbreviations:
-mc = magic circle
-sc = single crochet
-blo = back loop only
-scb2l = single crochet in back 2 loops
-sl st = slip stitch
-st = stitch (sts = stitches)
-fpdc = front post double crochet
-fptc = front post treble crochet
-sk = skip
-ch = chain
Special Stitches:
-front post double crochet (fpdc): yarn over, insert hook from front to back to front around the post of the next st, yarn over, bring loop back through, yarn over, pull through 2 loops on hook, yarn over, pull through remaining 2 loops on hook.
-front post treble crochet (fptc): yarn over twice, insert hook from front to back to front around the post of the next st, yarn over, bring loop back through, yarn over, pull through 2 loops on hook, yarn over, pull through 2 loops on hook, yarn over, pull through remaining 2 loops on hook.
The PDF pattern for this stocking can be purchased on Etsy here or Ravelry here.
Also, make sure to join our Brooklyn Hookers Crochet Group on Facebook. There’s always a code in that group when I release a new pattern…a free download of the PDF pattern through Ravelry. It’s only good for a limited time so make sure to join the group and not miss out on that. You can find the group page here.
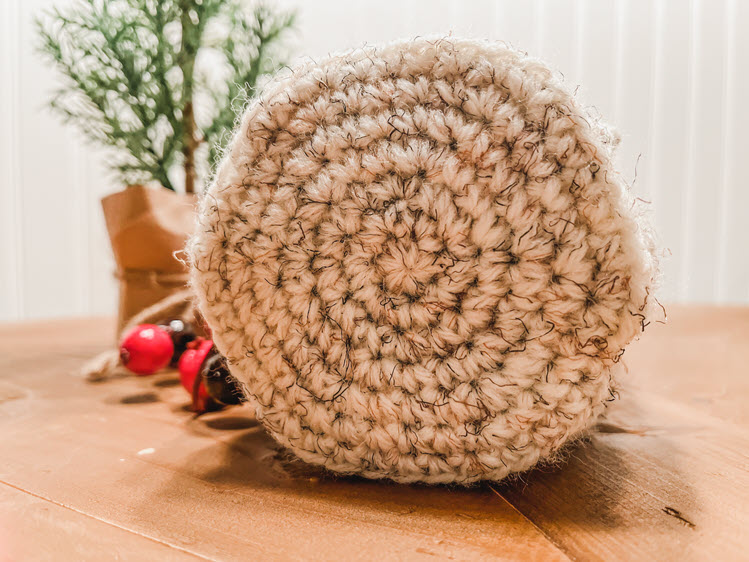
The Base
*Note: you may want to place a stitch marker at the beginning of each row or increase section to easier keep count
Make 6 sc in a mc and gently tighten
- 2 sc in each st around (12)
- [ 2 sc in next st, 1 sc in next st ], repeat around (18)
- [ 2 sc in next st, 1 sc in next 2 sts ], repeat around (24)
- [ 2 sc in next st, 1 sc in next 3 sts ], repeat around (30)
- [ 2 sc in next st, 1 sc in next 4 sts ], repeat around (36)
- [ 2 sc in next st, 1 sc in next 5 sts ], repeat around (42)
Now we will do a row of scb2l (single crochet in the back 2 loops) to “turn” our stitches up. You are going to work these sc’s into the back loop AND the loop behind that (on the backside of your work). Using these two loops makes the stitch a little more sturdy than just using the back loop only…since it’s holding precious cargo we definitely want it sturdy!
7. scb2l in each st around (42 here and throughout)
The Body
Now, continuing to work in the round, we will work the foundation row for our repeated cable pattern.
Worth mentioning: I have a terrible habit of reading too far ahead in a pattern…it’s so much stitch information that I confuse myself. If I can give you any words of wisdom as your starting this next section, it would be to take it ONE STITCH AT A TIME. Read each instruction, perform it, then move on. It makes it so much easier. I almost abandoned the first cabled project I ever did because I wouldn’t just slow down.
- [ fpdc in next 4 sts, sc in next st, fpdc in next 2 sts, sc in next st, fpdc in next 4 sts, sc in next 2 sts ], repeat [ to ] 2 times
- Repeat row 1
- [ sk 2 sts, fptc in next 2 sts, return back to the 2 sts you just skipped and fptc in each skipped sts starting with the first one skipped (you will be working OVER the first two fptc’s you made to make the twist of the cable…it’s going to look weird and bunchy here but stick with me, it’ll work itself out in the next round), sc in next st, sk 1 st, fptc in next st, return back to skipped st and fptc in it (again, working over the previous st), sc in next st, sk 2 sts, fptc in next 2 sts, return back to the 2 skipped sts and fptc in ea skipped st, sc in next 2 sts ], repeat [ to ] 2 times.
- Repeat row 1 – This can feel a bit tricky. Your first 2 fpdc’s are done in the FIRST 2 fptc’s you did at the beginning of row 3. This means they are located behind the SECOND 2 fptc’s you did in row 3. Stretch it out gently so you can do your first 2 fpdc’s in those two stitches.
- Repeat row 1
- Repeat row 1
- Repeat row 3
- Repeat row 1
- Repeat row 1
- Repeat row 1
- Repeat row 3
- Repeat row 1
- Repeat row 1
- Repeat row 1
- Repeat row 3
- Repeat row 1
- Repeat row 1
- Repeat row 1
- Repeat row 3
- Repeat row 1
- Repeat row 1
- Repeat row 1
- Repeat row 3
- Repeat row 1
- Repeat row 1
- Repeat row 1
- sc in each st around
sl st into the next st
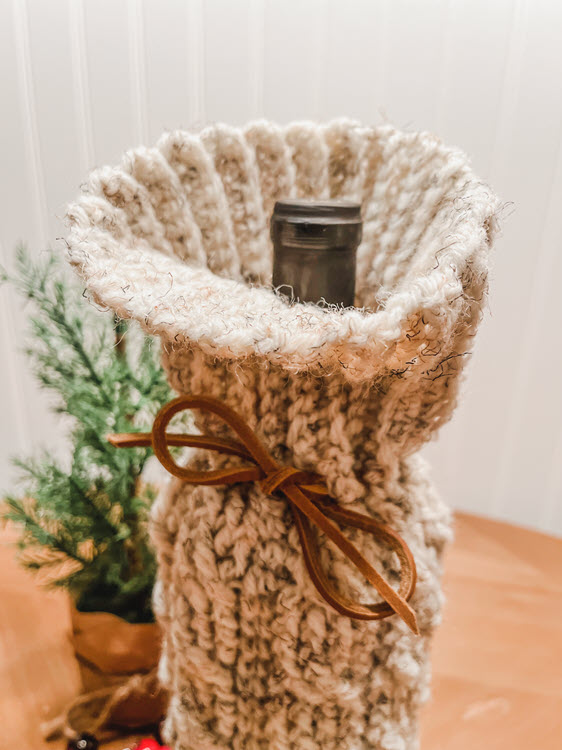
The Cuff
The cuff will be worked by making a chain and crocheting back and forth to get a ribbed effect.
ch 15, turn
- skip one ch, sc into second ch and each ch across back down to body of bottle cozy (14 here and throughout each row of the cuff)
- sl st to next st in top of the body (the st to the left (right if you are a left-handed crocheter) of the the st you slip stitched to after completing row 34)
- sl st to next st in top of the body once again, turn
- sc into blo of each st across (up your cuff), ch 1, turn (20)
- sc into blo of each st across down back to the body
Repeat steps 2-5 all the way around the top of the body stopping before row 5 on your last pass.
Place the beginning row and the ending row of the cuff on top of one another and sl st together 14 sts down to the body to join.
Fasten off and weave in end.
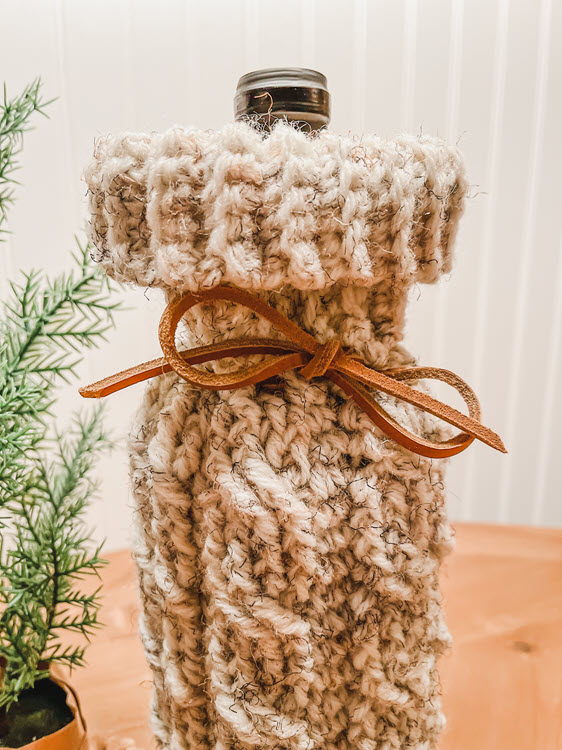
The Lacing
This part is easy! I simply took some leather lacing and worked it in and out of the stitches all the way around the base of the cuff. I inserted my bottle, cinched the leather lacing just a little bit and tied a bow.
If you don’t have leather lacing, there are a ton of different things you can use. Matching yarn, contrasting yarn, ribbon…really anything that will tie! If you decide to use yarn, it looks really cute to put tassels on the ends!
You now have a finished Cabled Bottle Cozy!
Thank you SO MUCH for supporting a very small business and designer. I appreciate each and every one of you more than you know!
I love feedback, positive or negative, and I certainly don’t get it right every time. If you have suggestions, criticism, or find anything that needs to be addressed in the pattern, PLEASE feel free to reach out via the Facebook Group below or email: jamie@brooklynhandcrafted.com
Happy Hooking!!
Facebook: https://www.facebook.com/groups/BrooklynHookersCrochetClub
Instagram: https://www.instagram.com/brooklynhandcrafted/ and don’t forget to tag me in your project pictures! @brooklynhandcrafted